How to Install an EV Charger Wall Plug at Home?

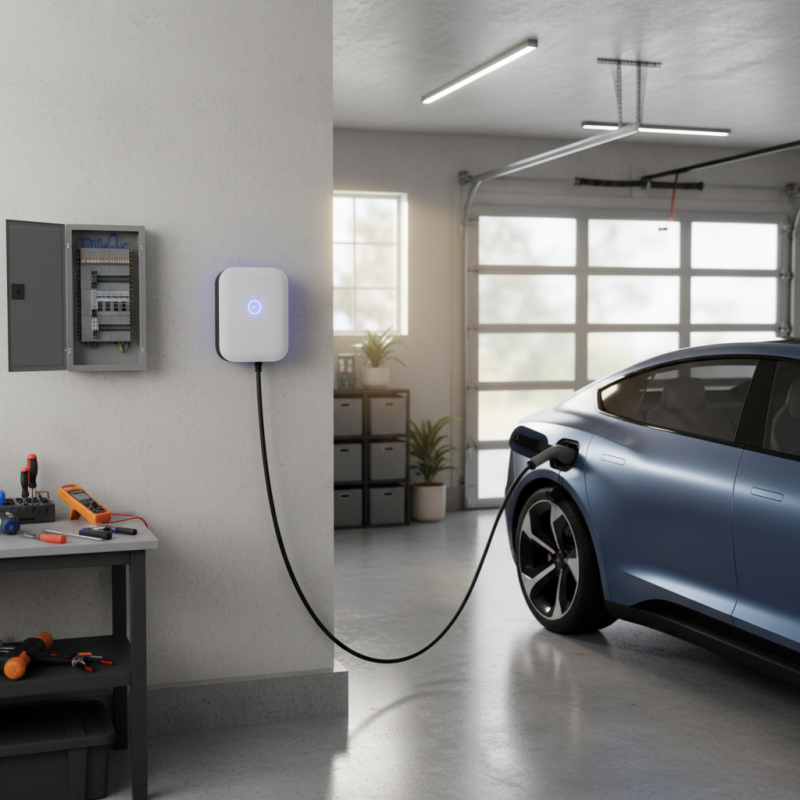
Installing an Ev Charger Wall Plug at home can feel daunting. Many homeowners worry about the complexity of the process. Yet, with the right guidance, it can be straightforward. Imagine coming home to a fully charged electric vehicle, ready for your next trip.

An EV Charger Wall Plug offers convenience and efficiency. You no longer have to rely solely on public charging stations. Consider the time and money savings. However, it’s essential to note that home installations may have challenges. Your home’s electrical system might require upgrades to support the charger. You’ll want to assess your space properly.

Research local regulations before beginning installation. Not all homes are equipped with suitable wiring. Seek professional help if needed. Remember, installing an EV Charger Wall Plug is not just about plugging it in. It involves planning, preparation, and a bit of patience. Embracing these steps can lead to a smoother installation experience.

How to Install an EV Charger Wall Plug at Home?

Choosing the Right EV Charger for Your Home Installation

Choosing the right EV charger for your home installation is crucial. There are several factors to consider. First, the power level of the charger matters. Level 1 chargers are slower, while Level 2 chargers offer faster charging. Think about your daily driving habits. If you often take long trips, a Level 2 charger might be the better choice.

Next, check your home’s electrical capacity. Many homes may not support high-output chargers without upgrades. Consult with an electrician to determine your options. It's vital to ensure safety during installation. Evaluate your charging needs and future plans for an electric vehicle. This foresight can save you from costly upgrades later.

Personal preferences also play a role. Do you want a smart charger that tracks energy use? Some people are drawn to this tech. Others prefer simplicity. Reflecting on your lifestyle can help you make a decision. There may be some trial and error involved, especially if you're a first-time EV owner. Keep communication open with your installer to make informed choices.

EV Charger Wall Plug Installation: Choosing the Right Charger

Assessing Your Electrical System and Charging Location

When installing an EV charger wall plug at home, assessing your electrical system is crucial. Start by checking your main electrical panel. Look for the amperage rating. Most home panels are either 100, 150, or 200 amps. If your panel is too small, you may need an upgrade. This can be a significant project, sometimes costing more than the charger itself.

Next, identify the charging location. Choose an area close to a parking spot. The cable run should be short to minimize energy loss. Consider how your vehicle will connect to the charger. Also, take into account the accessibility for maintenance. It's often overlooked, but addressing this can save you trouble later on.

Lastly, examine the existing wiring. Older homes might not have the right capacity. Corroded or bare wires can cause issues down the line. Enlist a qualified electrician if you're uncertain. Their expertise can help prevent future headaches. Remember, safety is key. Don't rush through this critical part.

Gathering Necessary Tools and Materials for Installation

When installing an EV charger wall plug at home, gathering the right tools and materials is crucial. Start with a power drill and appropriate drill bits. You will need wiring tools like wire strippers and connectors. A level is important to ensure the charger is mounted correctly. Don’t forget safety gear such as gloves and goggles.

You should also acquire electrical wiring rated to handle the charger’s voltage. An appropriate circuit breaker is necessary. If unsure, consult an electrician for advice. Double-check that you have all your materials before starting. It’s easy to overlook minor components like screws or anchors. Mistakes can lead to delays or even unsafe installations. Every detail counts, from ensuring a secure mount to proper electrical connections.

Step-by-Step Installation Process for an EV Charger Wall Plug

Installing an EV charger wall plug at home can enhance your electric vehicle experience. The process may seem daunting, but breaking it down step-by-step simplifies it. According to the International Energy Agency, the number of electric vehicle chargers installed globally has increased significantly. This growth shows that more homeowners are opting for convenient charging solutions.

Begin by assessing your electrical system. Ensure it can handle the extra load. An electrician can help here. They can evaluate whether your panel needs an upgrade. Once you’ve confirmed your system's compatibility, select an installation location close to your EV parking spot. This minimizes cable length and ensures safe operation.

**Tips:** Always check local regulations before installation. Some areas have specific codes for EV charger installations. You might face unexpected issues with permits. Be prepared for potential delays during the approval process.

Next, connect the charger. This step requires precision. Follow the manufacturer’s guidelines carefully. Mistakes in wiring can lead to serious damage. It’s useful to have a friend assist you. They can help hold components in place while you secure them.

**More Tips:** Double-check all connections before powering on the charger. It’s common to overlook small details. These oversights can cause larger problems later. Regularly inspect your charger for wear and tear once installed. Keeping it in good condition extends its lifespan.

Testing and Troubleshooting Your New EV Charger Setup

When testing your new EV charger setup, start with a thorough visual inspection. Check for any loose connections or damaged cables. Make sure the charger is securely mounted and that there are no visible signs of wear. This initial step can save you headaches later on.


Next, plug in your vehicle. Watch for indicator lights on the charger. These lights provide vital information about the charger's status. If the lights indicate a fault, refer to the user manual. Each error code may offer clues on how to troubleshoot. Don't ignore minor issues. Address them promptly.


If charging doesn't start, try resetting the charger. Disconnect and reconnect the power supply. Give it a few minutes before trying again. Still no luck? Consider seeking professional help. Sometimes, a simple installation flaw can lead to complications. Be sure to document each step, noting what worked and what didn’t. This reflection can lead to better understanding.

We are crowdfunding!
Privacy Overview

This website uses cookies so that we can provide you with the best user experience possible. Cookie information is stored in your browser and performs functions such as recognising you when you return to our website and helping our team to understand which sections of the website you find most interesting and useful.

Find out more about Kitepower's privacy policy